Appearance
Accounts
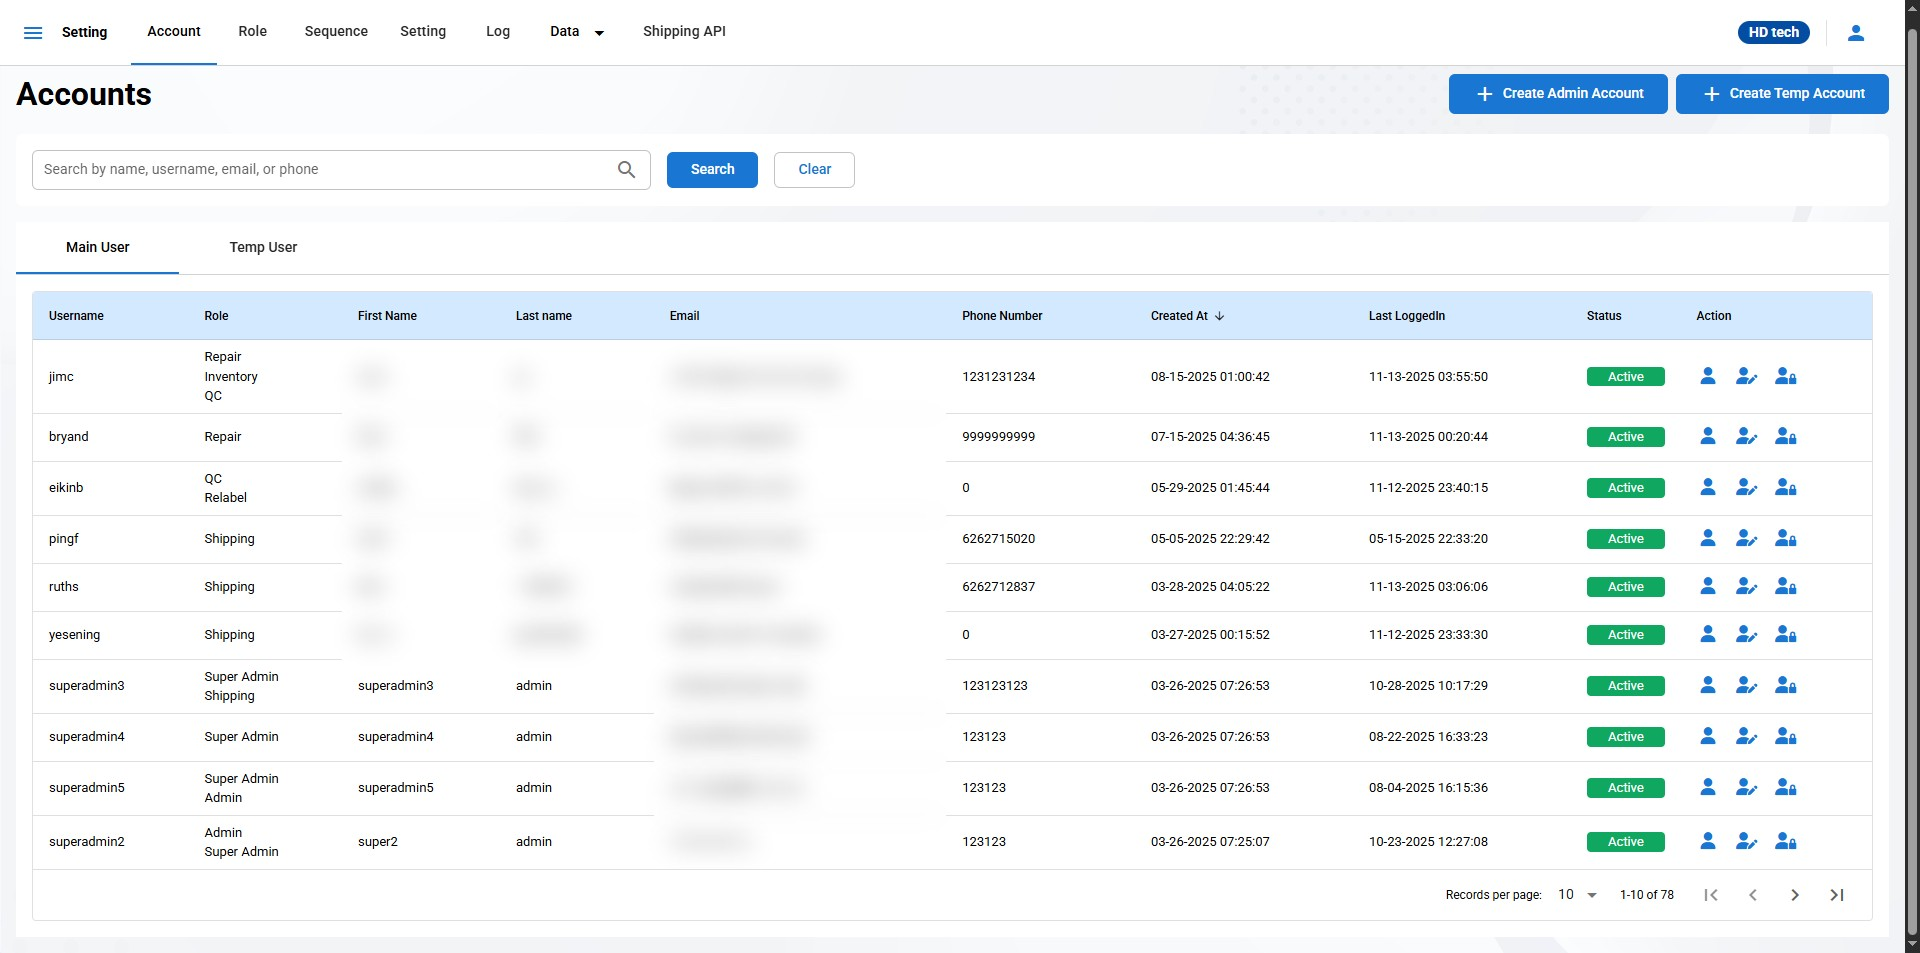
The Accounts page in your Warehouse Management System (WMS) is designed to manage user accounts, including creating, editing, and viewing user details.
The Accounts page lists all user accounts with their essential details, such as Username, Role, First Name, Last Name, Email, Phone Number, Account Status, and Actions.
User Details
Username: The unique identifier for each user in the system.
Role: Shows the role or multiple roles assigned to the user (e.g., Super Admin, QC, Shipping).
First Name
Last Name
Email: The email address associated with the user account.
Phone Number: Contact number.
Created At: The date and time when the user account was created.
Last Logged In: The last time the user logged into the system.
Status: Displays whether the account is Active or Inactive.
Create Admin Account
Click the "Create User" button to add a new user to the system.
The "Create Admin Account" page allows authorized users to create new administrative accounts in the system. Below are the instructions on how to fill out the form to create a new admin account.
Username:
Enter a unique username for the new admin account. This will be used for logging into the system.
Ensure the username follows any established naming conventions and does not include spaces or special characters.
First Name:
- Enter the first name of the user. This is required for identifying the individual behind the account.
Last Name:
- Enter the last name of the user. Along with the first name, this will help in identifying the account holder.
Email Address:
Provide a valid email address for the admin user. This email may be used for account recovery, notifications, and system alerts.
Ensure the email format is correct (e.g., name@example.com).
Phone Number:
Enter the phone number of the user. This is optional but can be useful for contact purposes.
Use a format that includes the country code if applicable.
Roles:
Select the role or roles that this admin account should have. Roles define the permissions and access levels the user will have within the system.
Use the dropdown menu to choose from available roles. Multiple roles can be assigned if necessary.
Create Admin Account:
After filling out all the required fields, click the "Create Admin Account" button to finalize the creation of the account.
If any required fields are missing or incorrectly filled out, an error message will prompt you to correct them.
Cancel:
- If you decide not to create the account, click the "Cancel" button to exit the form without saving any information.